Hopefully you’ll have your midi device all set up and raring to go – if not then check out my tutorial on getting it ready – Setting up a Midi Device in Reaper
All set?
Ok then.
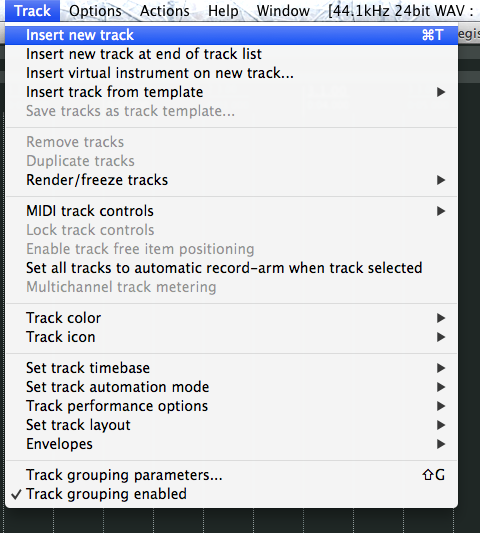
Open up Reaper and add a track.
Menu – Track – Insert new track…
Go to your new track,
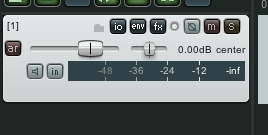
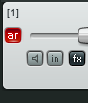
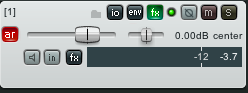
On the left hand side there is a little dull red button ‘ar’
![]()
Hover your mouse over this button and right click.
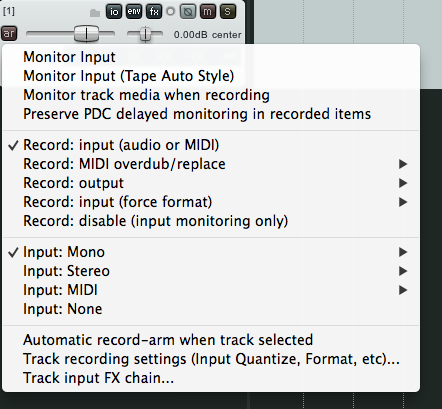
We have a few options here.
For now leave – ‘Record: Input (audio or MIDI)’ as it is.
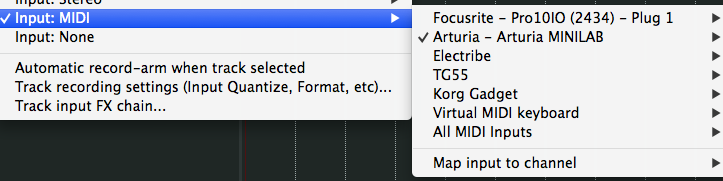
The option we are looking at is the third section down.
The one that says ‘Input: Mono’
We need to change this to,
‘Input: MIDI’
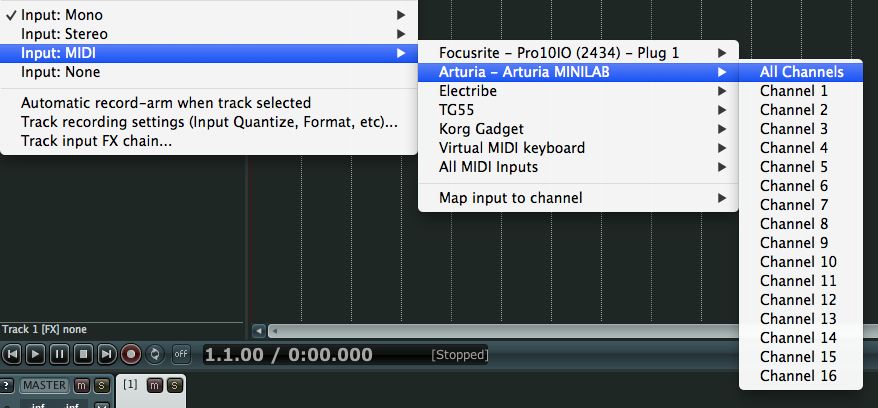
When you hover your mouse over the ‘Input:MIDI’ option it will open up your devices that are available. Hovering over your device of choice, in this case my, ‘Arturia Minlab’ you can then choose either, ‘All Channels’ or choose from any of 16 channels.
To start with choose, ‘All Channels’
Right click on the dull red button again and check that everything is correct.
If everything went accordingly you should now have two ‘ticks’.
One against ‘Input: Midi’ and one against your device.
To get your keyboard to make a sound you will need to ‘arm’ the track.
Click on the little dull red button.
It should now change colour.
Press the keyboard, try and play something. do you see any activity?
Yes? Then we should be good to go.
If there is no activity then you will need to check everything, including your midi device setup.
So ok, we have activity but no sound.
This is where it get’s interesting.
You need what is called a VST instrument, or AU instrument installed.
If you have none of these then you should take a look at the following tutorial.
For now we can use one that already comes installed with Reaper.
On your track, click on the ‘FX’ button.

On the left side of the FX browser click ‘Cockos’ – this is the folder where Reapers own plugins live. 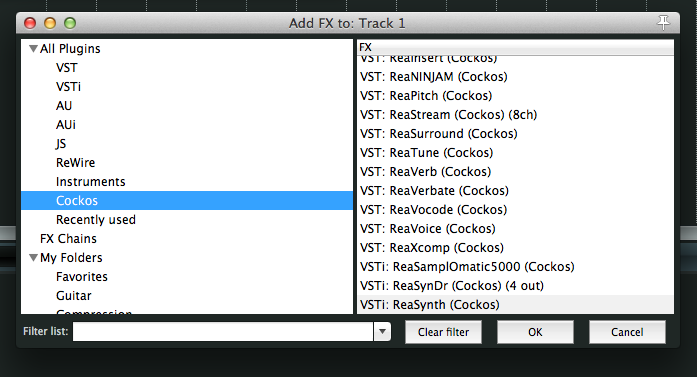
Now look at the right side and scroll down until you find, ‘ReaSynth’
This is a simple sounding instrument that can be quite useful if you ever get time to tinker – for now we are using it to get you used to setting up midi and recording.
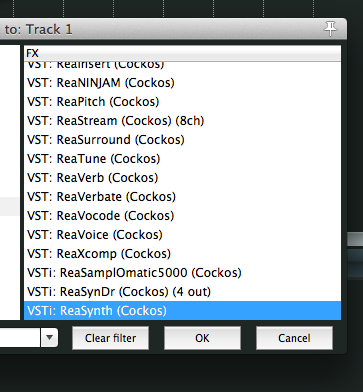
Double click on ‘ReaSynth’ and you will get the window below.

Shut this window down.
Now press a key on your midi keyboard.
Sound?
It’s very likely that the answer is still no.
We need to do one more thing.
We need to set up monitoring,
Underneath ‘ar’ and to the left is a button that has what looks like a speaker on it.

Press it once and you will see it change to white,
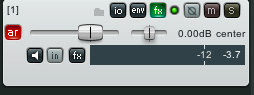
Press a key on you midi device(keyboard).
Getting sound now?
Hopefully the answer is yes – if not then something needs to be checked.
So there you are – midi is setup.
You can now start recording – there are more monitoring options – and there are also editing options once you have recorded but they are separate tutorials.
Have a play.
I’ll update with links to more tutorials regarding Audio and recording as and when they are written.
Try setting this up again – to save time you could create a Track Template by following this tutorial –
Reaper Tutorials: Track Templates – Workflow – Favourite Settings